 |
| view Palette / NeonMonday on COLORlovers |
this site is currently under construction! ...come in and take a sip mixed of Crafts, Creative Inspiration
...please hang on. will be back soon! =)
and a big dash of all things swell & splendid.
Please note...:
--- Since this blog is new and I'm learning on the go, it's still under constant construction. - I appreciate hints, tips, comments, complaint and critiques! Just drop me a line...--- ^-^ thx
Montag, November 05, 2012
Sonntag, November 04, 2012
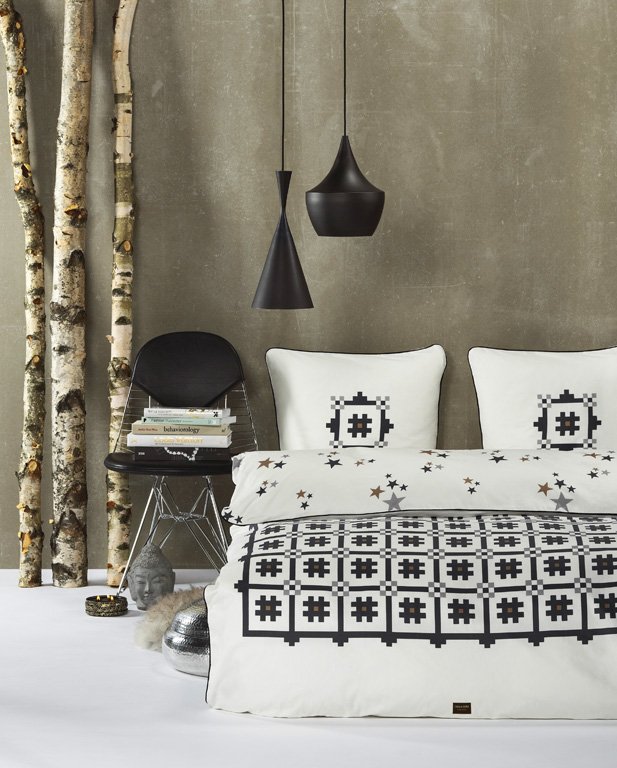
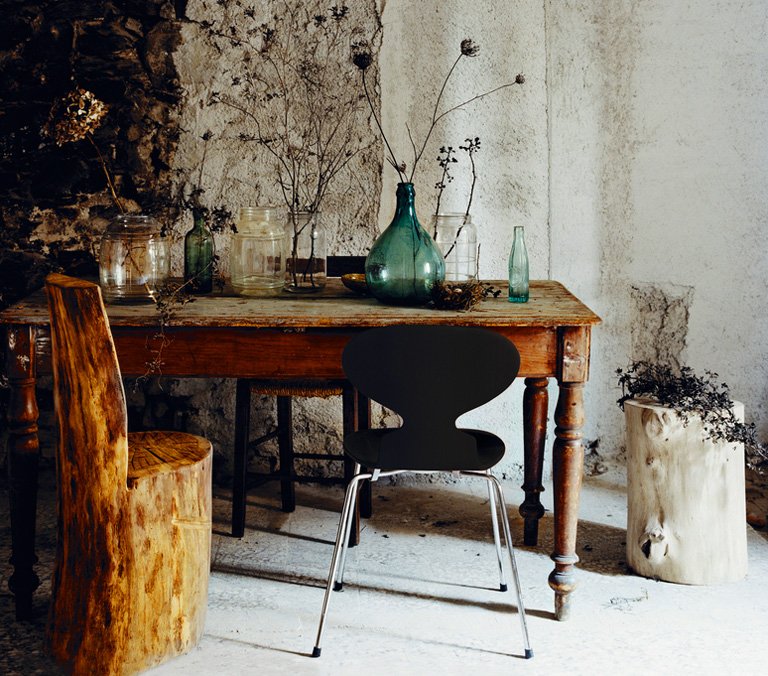
Wood needs to be naked...
Some days ago I cracked my teapot, having the freshly boiled water spilled all over our kitchen counter. Worse things happen of course, since it was just water, BUT our counter is of barely treated (we oiled it roughly just once) beechwood. It soaks water quite fast and already has lots of coves, rifts and stains. That reminded me on how urgently we wanted to fix that kitchen problem - but somehow I don't really want to. I like that used look it has gotten.
Flaws here and there, patina and purity... don't you think, too, that this gives the material a certain honesty and more corporeal, palpable feeling of reality?
I know there're options to conserve woods, without influencing their natural look too much.
But still, I wanna see my wood counter live and wither. ;)
Impermanence is so much more exciting than pretended immortality!
These are some adorable examples of patina-permitted wood used in Interiors.
 | |
| via The Yellow Door Paperie |
 |
| via The Persuit Aesthetic |
 |
| by Rikki Tikki via Schoener-Wohnen.de |
 |
| via Schöner Wohnen.de |
Labels:
bed
,
decoration
,
design
,
inspiration
,
interiors
,
nature
,
photography
,
rough
,
sleep
,
wood
Freitag, November 02, 2012
Grand opening of Tiki's DIYary!!! ^-^...today : ~~ Hand-painting a color lined Shirt ~~
So here's the first CRAFTY POST I'm sending out. =D
I'm really excited to publish this! ^-^
Actually it's nothing special for you Readers, but since I'm new to the Blogworld, and still got a lot to learn, this Project - or more precisely: its documentation - took me a lot of work and time.
The making of the shirt itself, took only a few hours (plus drying time), but it was a long road to the point I'm writing this. Exams in college and the start of a new semester afterwards kinda got me stuck in a whole lot of other things to do than blogging. :/
But as I tried to introduce in the latest post on the whole idea of that DIYary section here, I'm gonna just try to go through the making of that crafty stuff here, documenting what happened, and maybe shouldn't have happened. You can re-craft this, or improve the idea for your own needs, learn from my mistakes, or just scroll through the pictures and think what a fool I am thinking this would be interesting at all...
whatever you like - hope you enjoy it.
And please feel free to leave critical comments...;)
 |
| BEFORE - AFTER |
For the design I roughly played around on Photoshop to get an idea.
I saved pics of basic shirts from the H&M online shop before, so I can
digitally paint over them to try out how designs will look in the end and how big I should make them.
This was the 5-minutes messy sketch I made for this graphical top.
I saved pics of basic shirts from the H&M online shop before, so I can
digitally paint over them to try out how designs will look in the end and how big I should make them.
This was the 5-minutes messy sketch I made for this graphical top.
Here's the raw materials I used.
- a plain white cotton shirt from our favourite swedish fashion empire;)
(I love these, because they're incredibly cheap (about 5€), available in various colors and - which is crucial for me personally - long enough!)
So just check the label before you start.
- self-adhesive book foil (it's my first try working with this foil as stencil material. It's simply that transparent stuff you can wrap around your study books or something, to protect them from dirt, liquid, scratches and co. You'll find it in any stationary store or supermarket)
- textile paint (I like Javana Tex or Marabu, which are both similar in prices and I never made bad experience with those. They're available in almost every arts or hobby supplies shop)
- two simple brushes - 1 bristle brush (for tapping the paint onto the stencil) and 1 thin brush (for the manual corrections afterwards)
- scissors & cutting knife (crafting scalpel)
- cutting mat
- triangle ruler (suggesting a big one - 30cm)
- big sheet of cardboard (cut to size, that fits inside the shirt - covering all the area you want to paint)
- ball-pen or pencil
- a sheet of backing paper
- flat iron
Abonnieren
Posts
(
Atom
)


